To create a simple Oil Drum in Autodesk 3d Studio Max, you must start with a basic cylinder primitive. After altering the initial parameters to something suitable, such as Radius = 35, Height = 100, Height Segments = 1, Cap Segments = 1, and Sides = 18 (by default), you must convert the cylinder to an Editable Poly.
After converting the cylinder, you must then highlight all of the vertical edges, using the Edge selection too, which is the red triangle in the editoing panel. You can do this by selecting them all individually, or by draging a selection box over them while looking at the mesh in a side view. When they are all selected, select the “Connect” buttons settings, which is the small box just to the right of the “Connect” button. On the settings box that will appear, change the “Segments” value to 2, and the other values both to 0.

A cylindrical Editable Poly, with the Connect settings box visible.
With the newly created segment edges, select the “Extrude” function settings, and extrude them to a suitable distance, such as 2.5. After the extrusion, select the Polygon selection tool at the top of the editing panel, and select the top cap segment of the cylinder. When it is selected, open the “Inset” function settings, and inset the cap to a suitable distance, such as 2.

After the cap polygon has been inset.
Once you have inset the cap polygon, open the “Extrude” function settings again, and give the cap a suitable negative extrusion. -4 should be fine. After the extrusion, you must once again inset the polygon, but to a much more dramatic degree. After insetting the polygon a suitable amount, such as 27.5, you must use the Move tool to move the polygon closer to the edge of the barrel.

A barrel which has had the top cap segment inset, negatively extruded, inset again, and had the main circle polygon moved closer to the edge.
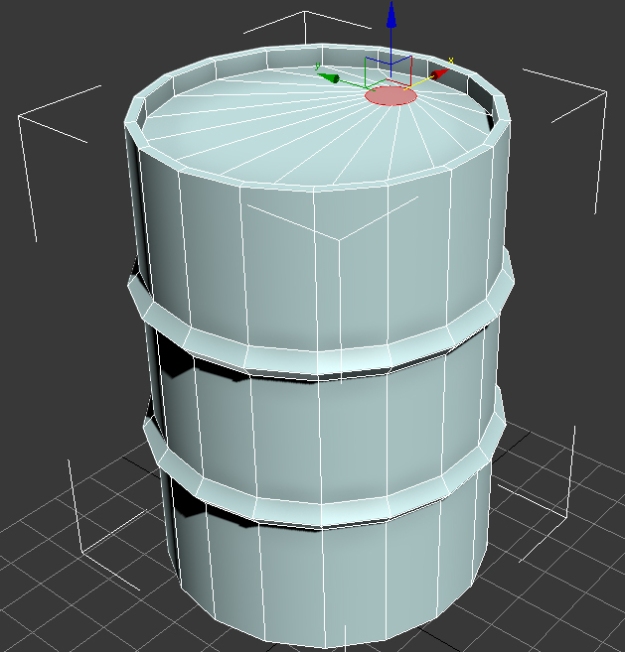
After moving the polygon to the edge, you must then extrude it out again, but making sure not to extrude it more then the previous extrusion. e.g We negatively extruded the cap segment by -4, so we shouldn’t extrude this more then 4. After extruding the polygon, you should have something like the picture below.

The fineshed barrel mesh, ready for texturing.
